One thing that you can automate is responding more promptly and relevantly to initial client enquiries. At Novus we get a lot of enquiries on Facebook, some are genuine some are not. I created a Mailchimp form collect some information from those people making enquiries. The goal is to get the information that I (we/Novus) need to respond, and an automatic email to the person making the enquiry with our details.
This will also filter out bots that are simply sending random messages to our business page with ‘Can I ask you a question’ type enquiries.
In order to do this you need different ‘audiences’ in Mailchimp so that you can have different sign up forms and send different emails in response. Mailchimp moved multiple audiences to their paid accounts a while ago, this is one of the many reasons that I personally prefer Mailerlite. However, one work around if you have multiple staff (or multiple work email accounts) is that each email address can have a Mailchimp account, then they can each have the audience that is relevant to that email address and be responsible for responding to those enquiries.
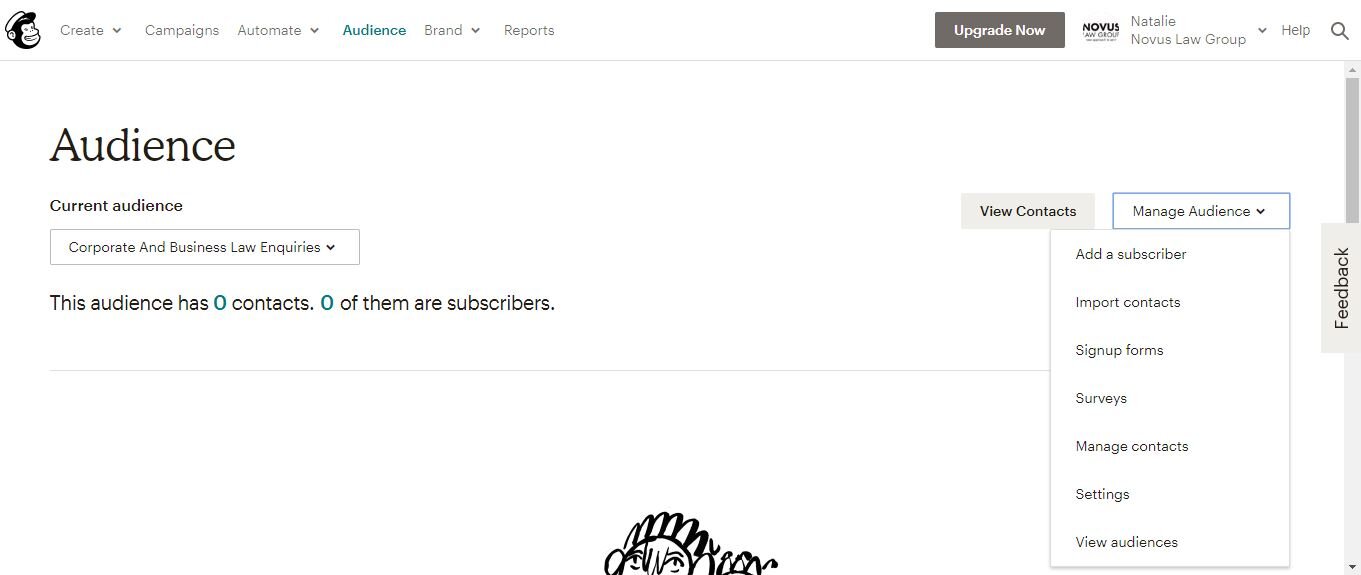
If you created audiences before Mailchimp turned this feature off (I had two audiences) then in order to find the relevant audience or group you go to the ‘Audience’ tab at the top of the Mailchimp page, and then use the drop down down box called ‘Manage audiences’ to choose ‘View audiences’.
As I already had two audiences in this account, when I go to the audiences tab I need to choose. You my just be choosing the one audience that is there.
I am choosing ‘Corporate and Business law enquiries’ which you can see currently has no contacts or subscribers.
Now I am going to click on the drop down box next to ‘Stats’ and choose ‘Signup forms’. For some reason the site is not allowing that drop down box to stay while I get a screen shot so you will just have to take my word for it, that there is in face a ‘Signup forms’ option when you click ‘Stats’.
When you click Signup Forms you will get this screen. Click ‘Select’ next to the ‘Form Builder’ option.
Now you are on the form builder page. You will use this form to collect information from your perspective client so that the correct staff member can call them and have an intelligent conversation, rather than sorry, I don’t do family law, let me have Jane Smith call you back.
Under ‘Forms and response emails’ the option ‘Signup form’ should already be selected. That is what you want. Scroll down to the ‘Build it’ heading.
The first thing I am going to do is edit that heading to be more relevant to the person filling out their details. If you hover over the title itself you will get some options, including ‘edit’. I changed the title to ‘We want to talk to you’ to make sure that they realise they are in the right place.
Now hover over the explanatory text below the heading and you will again get an edit option. Again I am changing this to be more relevant to the goal that I am trying to achieve (which is getting them to give me enough information to respond meaningfully to them.)
Now to make the form data relevant. You can simply drag and drop information that is already in the form.
Over to the right of the screen we can add text boxes, check boxes and other details (like Number for phone number).
I use the text box to try and get them to tell me what their question is, the check boxes to get them to answer some basic questions, and obviously the number box to make sure that they give me their mobile number so that I can call them back. Then I head over to the ‘Design it’ tab, (look for three tabs, ‘Build it’ and ‘Design it’ and ‘Translate it’).
Here you can change the look and feel of the form to make it feel more personal, and less like they are merely submitting their details.
When you hover above the heading (where it says “We want to talk to you.” above) then you get the option to change it to an image, which I decided to do. The image I used was our logo. I also changed the background colour to our brand colour, but honestly anything other than that stock standard grey would help personalise it.
Now I am going to embed this form into our Facebook business page’s automatic replies, because we get a lot of enquiries there. Here are some instructions from Facebook regarding how to set up an automatic reply.
If you want to follow along with the other automations that I am doing and receive instructions to do them then please join my specific mailing list for automations here.


